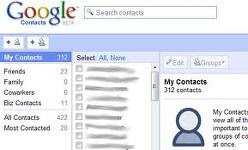
One of the most important part of a cell phone, the data existing contacts in the phonebook. Most people are not memorized the phone numbers listed in the phonebook it, so if the phone is lost or damaged then the contact data is also missing. Therefore, to anticipate all sorts of possibilities then you should regularly back up your phonebook. One way is online backup.

Some operators are in phonebook backup service. But, of course, paid monthly. If you want free and then be able to use the facilities, the timing of Google. But, of course, have a Google account and the phone supports auto-synchronization.
Most Nokia phones have this feature. Google currently offers SyncML to sync contacts and online backup free Symbian smartphones Google. But only for contacts. Not for the calendar. Taking all Google contacts with all the details, including contacts notes and thumbnails. You can refer to the instruction here, but my statement is a little dated.
When the body of synchronization, an address book is synchronized with Google contacts. Data Connectors Google will also synchronize the phone. Therefore, you must create a new Google account designated specifically for backing up contacts, if you do not want to confuse the address book contacts from Google.
This is the time of instruction and online backup contact Google for Symbian devices via SyncML ^ 3, which can also be used for Symbian devices over 1 ^ (But there may be some changes in the interface here and there and some features may not be available on older devices).
1. In its Symbian samrtphones ^ 3, go to Settings - Connectivity and select Data transfer.
2. Within the data transfer, select Sync.
3. Press Options and select New sync profile.
4. Then select Start.
5. Give a name to this new profile, or Google (You can put any name you want. Something that can be easily understood).
6. In the server version, select 1.2.
7. In this, select the Address Book only. Other options are irrelevant.
8. In the database of contacts, type (please type exactly as shown in the screenshot. Caps.)
9. Data bearer, select Internet.
10. Host address. Type exactly as shown here: https: / / m.google.com / SyncML. Note the https.
11. Enter the ID of the Google servers. Use a capital "G".
12. Username. Your Google Account username. It is your full Gmail address or e-mail Google Apps.
13. Password. Obviously ... anyway, your Gmail / Google Apps for your password.
14. Now a new SyncML profile was created. Press Yes to activate it.
15. You will return to the main page Sync. Now you can set for automatic synchronization. If you prefer, you can also synchronize manually. If you want to synchronize automatically, press Options and select automatic synchronization.
16. Here, in sync, and define what data you want to use the auto-sync and the time frame and time synchronization occurs automatically.
17. You can also synchronize manually.
18. When you sync, you can see the little sync icon in the taskbar.
19. E 'can also view the log after a successful sync.
20. This is a review of the next synchronization. (ASRI al-Baker)